Configuration of data model
- 12 Apr 2022
- 9 Minutes to read
- Print
- DarkLight
- PDF
Configuration of data model
- Updated on 12 Apr 2022
- 9 Minutes to read
- Print
- DarkLight
- PDF
Article summary
Did you find this summary helpful?
Thank you for your feedback
Configuration of data model including property window, list and filter for a module
Recently we presented an improved version of how to set up a data model for each module in the system. This new improved way should make it easier for those who have worked with the setup of the system (Administrators) and need to have an overview of all the fields used in the relevant module and how it can be separated into a an overview of the fields that are used in the property window, list and filter as well as being able to adjust access to sub data and actions for the module - all in same place. We have also added information about the history of how the data model has been changed so that it is easier to track which fields have been removed or added, both for the data model in general but also for each user role.
It should be noted that only users in user roles marked as Administrator can access the configuration icon in the top right corner for each module.
When a user is in a configurable module window, a symbol appears in the right corner to switch over to the configuration window - here after called "Edit mode".
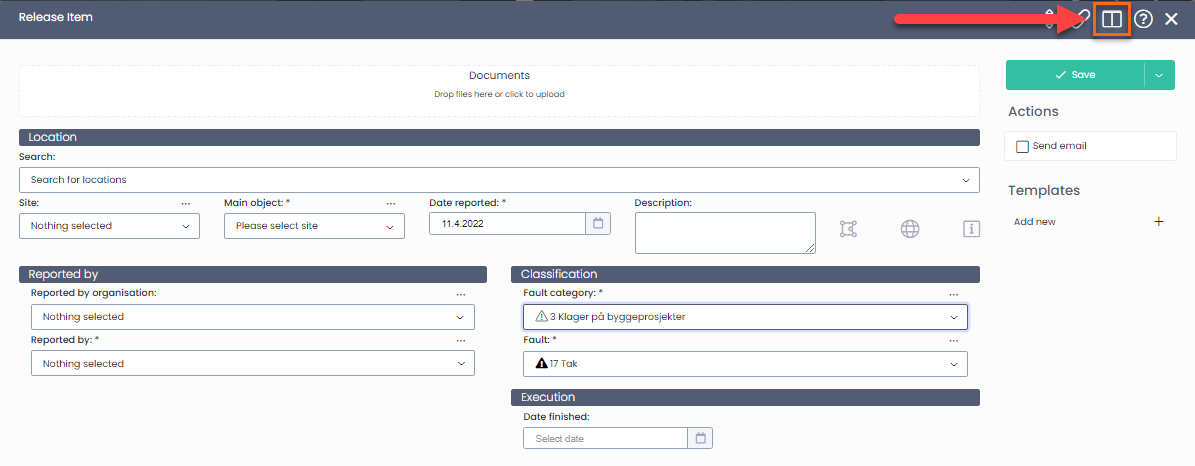
First of all, it should be mentioned that when a system module runs in the standard solution of MainManager, the property window will look like this when you first enter the Edit mode for the module (An example shown here is from the Release Item module)
However, this does not mean that no window, list or filter is accessible for the module, only that it is running on the standard data model from MainManager. While a module is running this way, it is not possible to do any changes on the general layout of the window, list and filter, but users can still work individually with the fields that have been defined inside the list and filter, move them to and add/remove fields that are within the default data model.
As soon as there is a need to add or remove fields from the module, change the layout of the window, etc. then you need to start by creating the data model for the module by clicking the green button "Create data model".
After that, the appearance of the Edit mode changes and at the front an overview of the entire data model of the unit is displayed, as it is according to MainManager standard.
It should be also be noted that on the right there are two actions accessible:
- Set custom property box settings.
- This action can be run if the module has some (customer) specific logic (eg from version 11) that needed also in the FM solution. If the module has any such logic, those options appear when the action is run and the user can mark the options to be used.
- Restore to standard data model.
- This action can be run if for some reason the admin wants to reset the relevant module to run according to the MainManager standard data model.
Data model
Under the Data model tab, all fields that are in some way accessible in the relevant module are displayed (after the data model has been created). However, it differs whether the field in is accessible / visible in the window, list and / or filter. The symbols beside each field name indicate this.
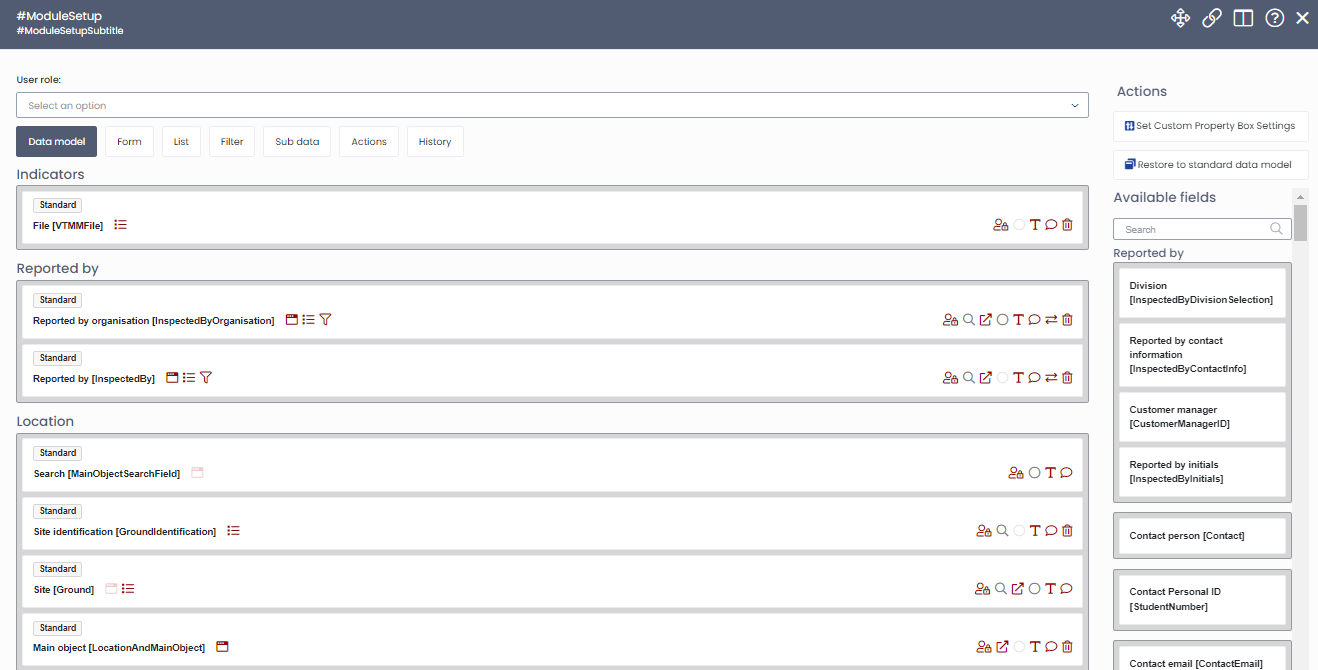 Example from an Edit mode window where data model has been created and Administrator can configure access etc.
For each field there are various options and also it is visible now if the field is a standard field from MainManager or not. On the right the user can click on an available field to put it into the data model.
First we introduce what each icon means within the Edit mode window for the fields.
 A field is accessible in the window
 Field is accessible in list
 Field is accessible in filter
If the symbol is faded out, it means that the field is accessible, but it is not possible to change access to it, e.g. because it is required for fill out and therefore cannot be removed or hidden.
Those icons can all be pressed to change the accessibility to the field in the window/list/filter. It will then become grayscale, indicating that the field is no longer accessible at that location. Note that if all the icons on the left (remove accessibility) have been "switched off", this will be have same functionality as clicking on the trash can, since the field is no longer accessible anywhere within the module.
On the right side there are more options for each particular field:
 By clicking this icon you will get up an action to configure access for specific user roles to this field information.
 By making this icon red (clicking on it), you have made it a searchable field in the right filter for this module. Notice - choose this carefully cause if you have selected many fields as searchable it might slow the system down.
 This icon appears for fields that are drop-down boxes and the administrator can edit the content. Clicking on the icon will display a list of the data below which they can edit if needed and the user has the access to the respective data.
)

By clicking this icon you will be able to edit the caption of the field.
)
 This icon appears if it is possible to change the selection type of this field - in the form and/or in filter. This might i.e. be useful if you want to be able to filter on more than one status at a time, either by selecting them from a checkbox list, or multi selecting from a drop down list.
)
Available fields
On the right side, a toolbar for all available fields that belong to the module are displayed, but which are not a part of the data module at this time. Fields can be clicked to put them into the data model and they will automatically find its place within the data model. Above the toolbar is a search field if the user knows the fields name. The possible fields are of different types e.g. date, text box, drop-down lists, checkbox (boolean), etc.
To remove a field from the window, press the trash can above the field. It is then moved to the toolbar on the right.
User role customization
Once a data model has been configured for a module with all the fields that are to be used, the setup can be customized for each user role. This is especially convenient when e.g. some user roles only need to see a simple version of the registration window or should not be allowed to change or view certain information.
This is done by selecting the user role from the drop-down list above, and after that the view of the configuration window changes a bit. The Administrator can select to i.e. hide information from window/list/filter or lock/hide the field totally by clicking the icons on the right.
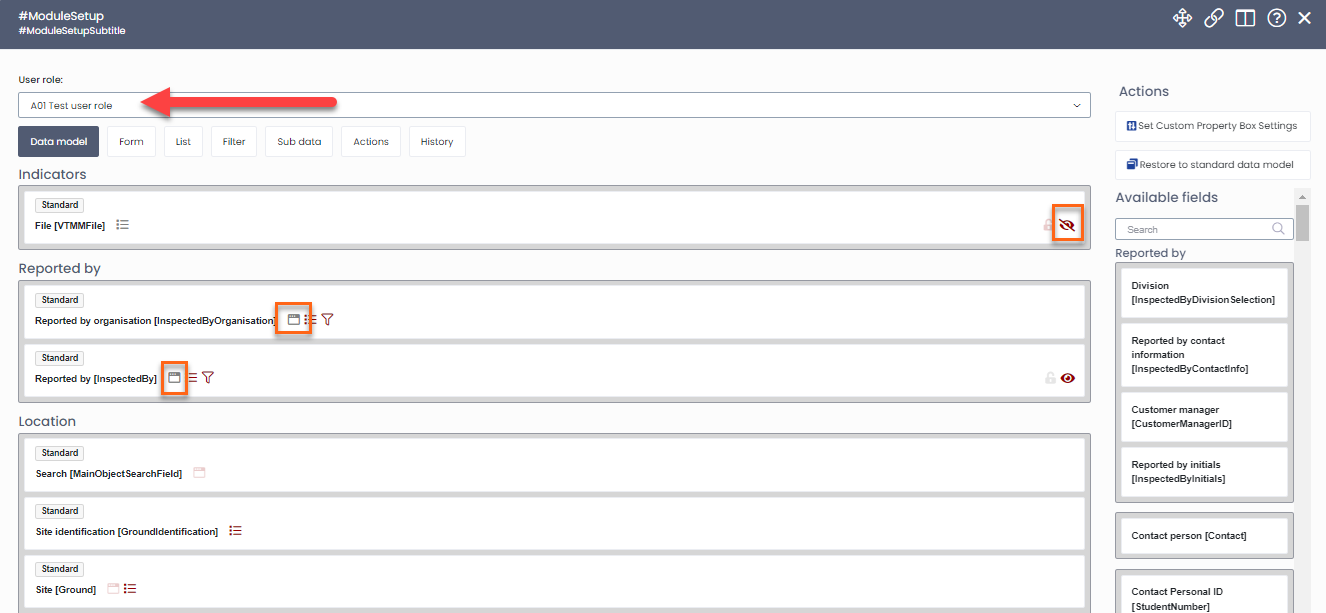 "File" field is not visible for Test user role and "Reported by" information have been removed from window but are still accessible in list and filter
Form
Here is an overview of the fields that are marked as accessible in the property window from the data model. The fields are arranged in the window/form in a certain way, but here you can change the order like you want by dragging the fields within the form. However, this needs to be done for global setup, i.e. the form can not be arranged differently for each user role.
When a certain user role is selected above, you can see what the form looks like for the relevant role in such a way that the fields that are hidden or locked are marked separately.
It should be noted that here it is also possible to register an information text for the window/form globally, but also a specific one for each user role. This text can be formatted in a certain way i.e. size, color, background and fonts. You can also add images or links. This text is then always visible at the top of the registration form.
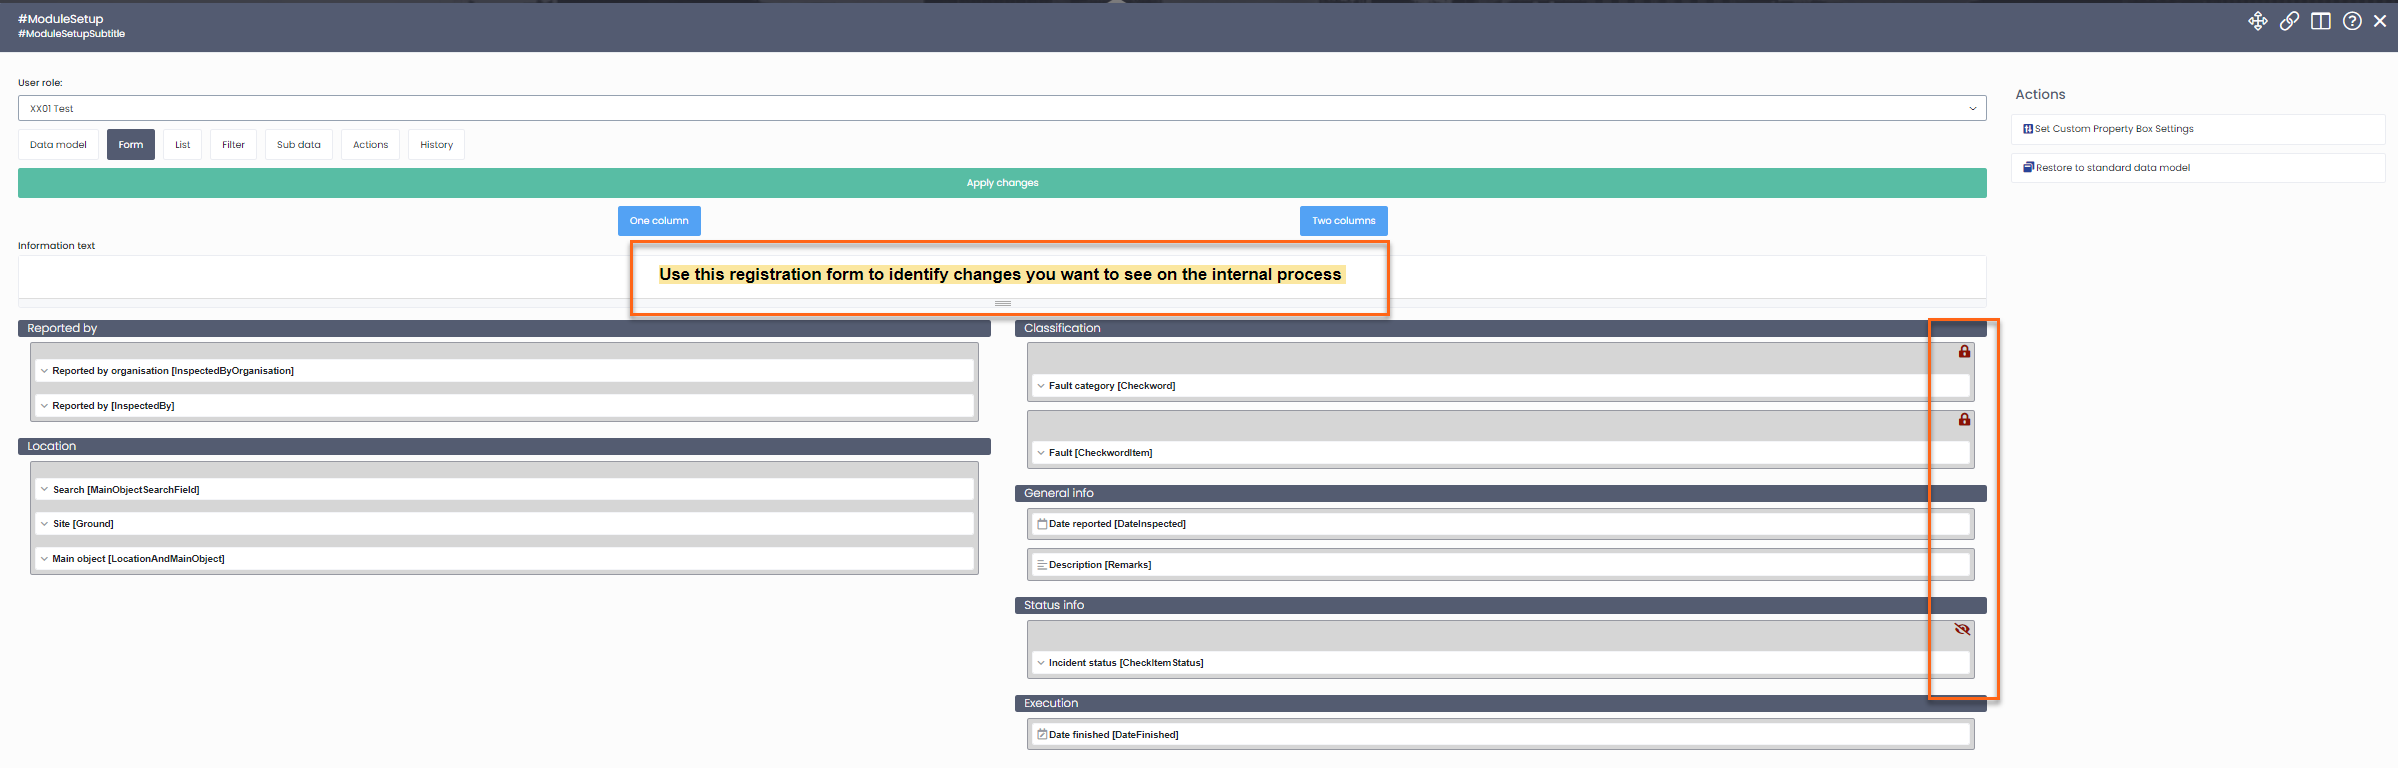 An example of how fields are ordered in a form for a user role. Information text has been registered above. Two fields for this user role are locked and one is hidden.
List
Here you can see an overview of all fields that are marked as list accessible in the data model for the relevant module. Automatically the fields will be arranged in a certain order and it should also be noted that not all the fields that appear here in the list are necessarily marked as visible. This means that the list will automatically only show the fields that are marked here, but the others are still accessible and any user can add them to their list by right-clicking on the column header and checking the box for the hidden field.
Remember that you have to press "Apply changes" to save all your changes to the list view before you go to another tab or select a user role.
 Example on how the list columns will be ordered. Two of the columns/fields are not marked and are therefore not default visible.
Filter
Here you can see an overview of all fields that are marked as filter accessible in the data model for the relevant module. Automatically the fields will be arranged in a certain order but it is possible (on global level) to order them differently if needed by dragging the fields over to another place.
Remember that you have to press "Apply changes" to save all your changes to the filter before you go to another tab or select a user role.
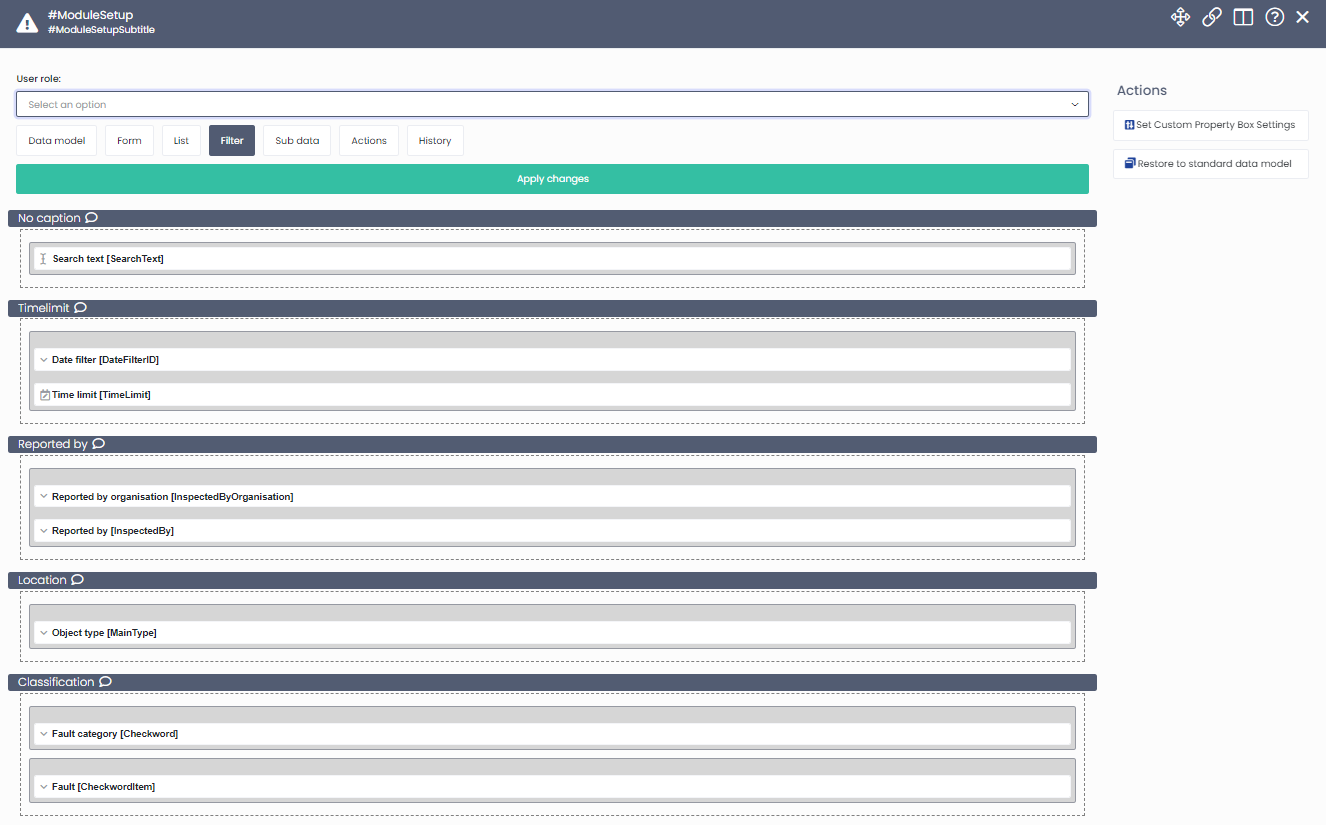 Example of filter fields and how they will be ordered in the filter
Sub data and Actions
In these two tabs, the Administrator can configure access to Sub data and Actions for this module. Therefore, you need to start by selecting the relevant user role and after that you can mark the Sub data / Actions that the relevant role should have access to.
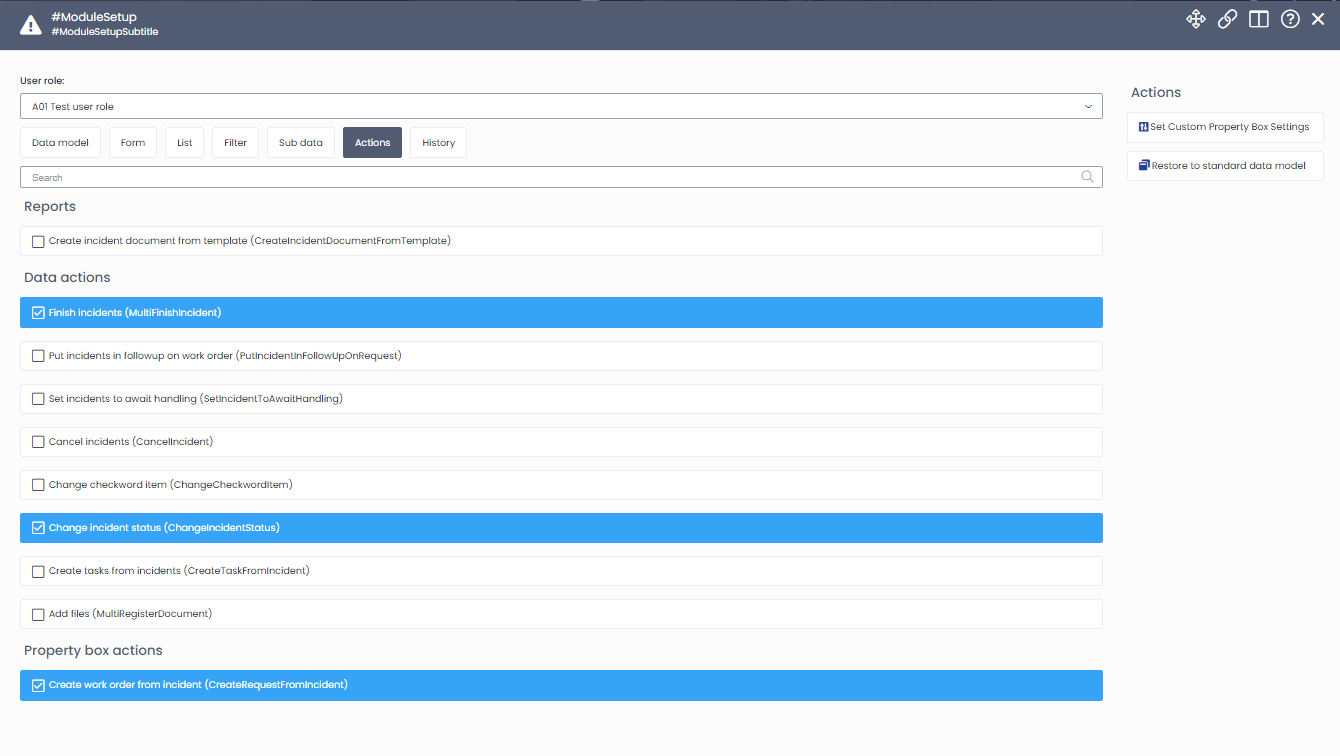 Example from Actions tab where the Administrator has marked access to three actions for the "Test user role"
History
Here is an overview of all changes that have been made to the data model for this module. This applies to whether fields are inserted into the data model, removed, moved around, and how the access has been configured on fields for each user role. This makes it easier to track who has made changes to the data model and when.

Was this article helpful?